
I thought I had a nice home lab with my thin computer, but now i have a home lab in my pocket.
I setup my old Samsung Galaxy S21 Ultra as a web server. This has to be the coolest thing I have in my home lab arsenal. The machine is surprisingly performant, small, produces very little heat and is incredibly quiet.
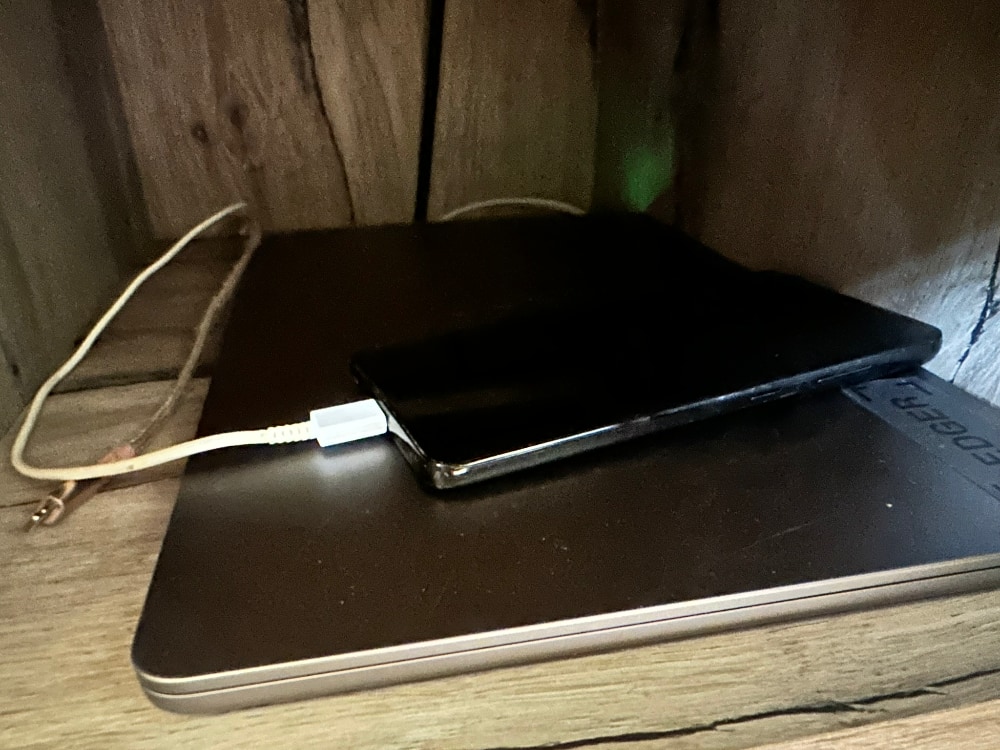
It literally sits on top of thin.computer in a cupboard in my desk. Both arm machines have little to no ventilation and, yet, no heat is emitting from here.
HOw to set it up
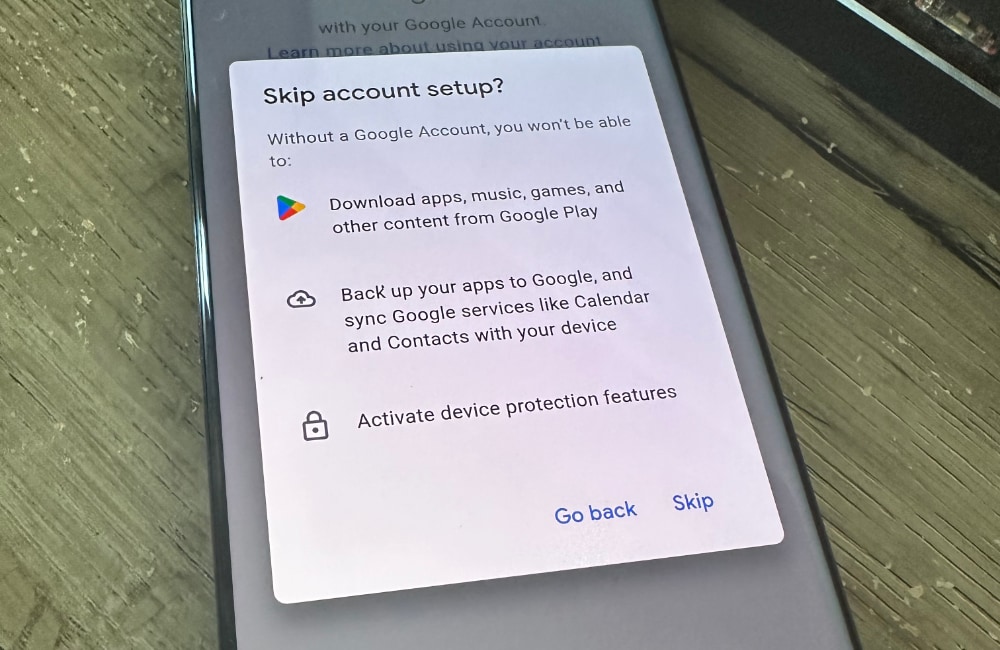
First, I setup my phone without a Google account nor a Samsung account. Some Google software still gets installed, but it’s not logged in.
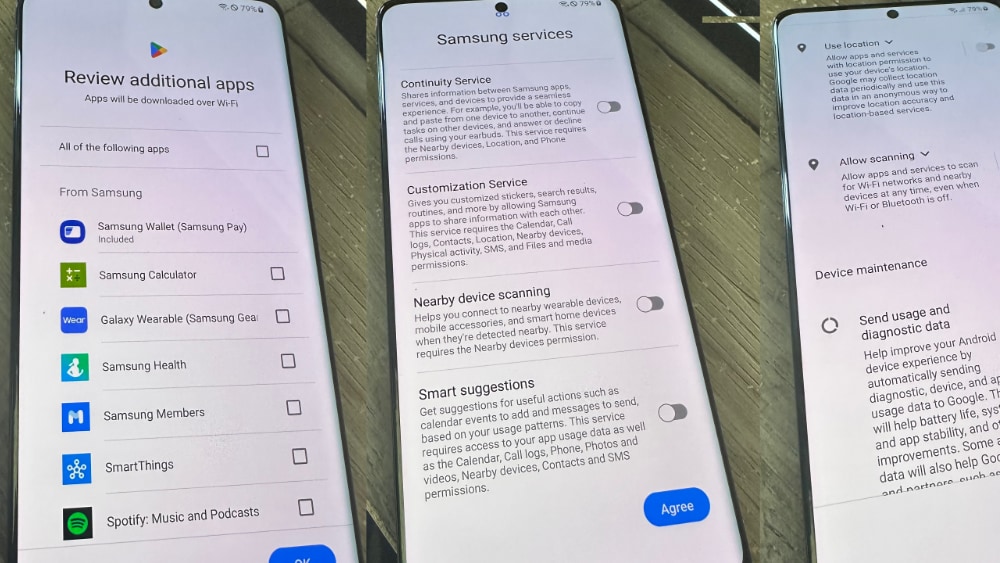
I also made sure to disable any extra services. This is a server, we don’t need any of this.
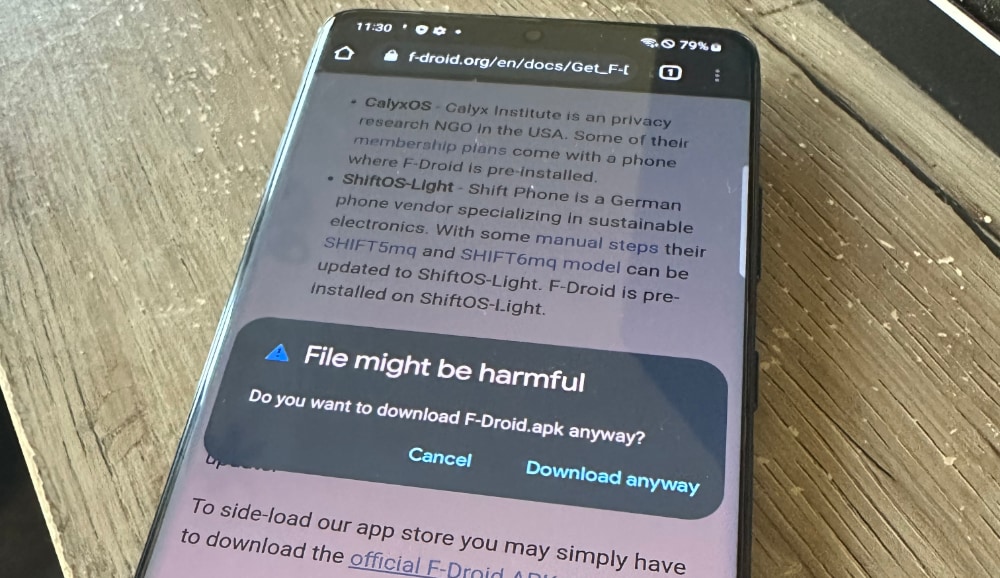
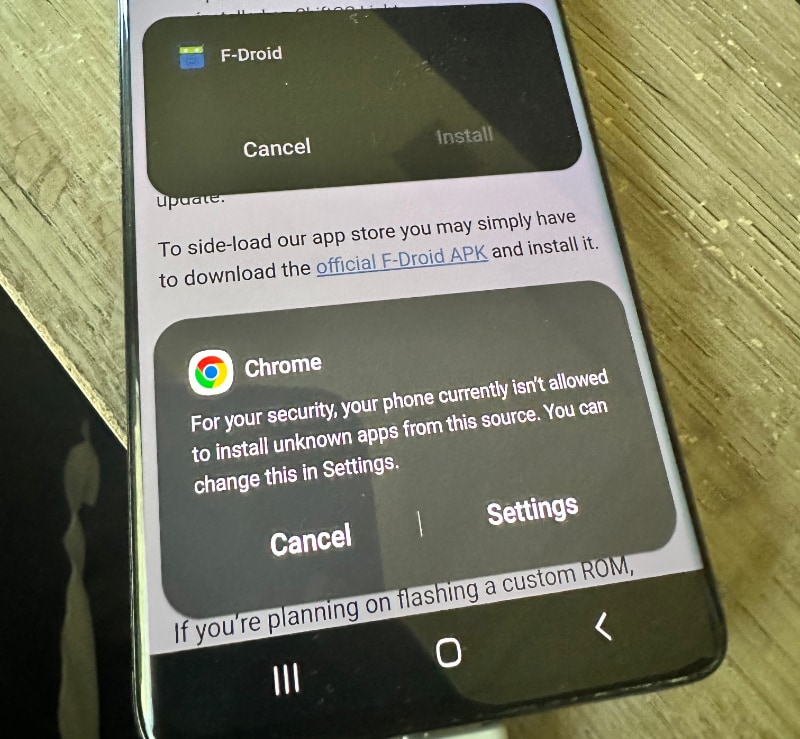
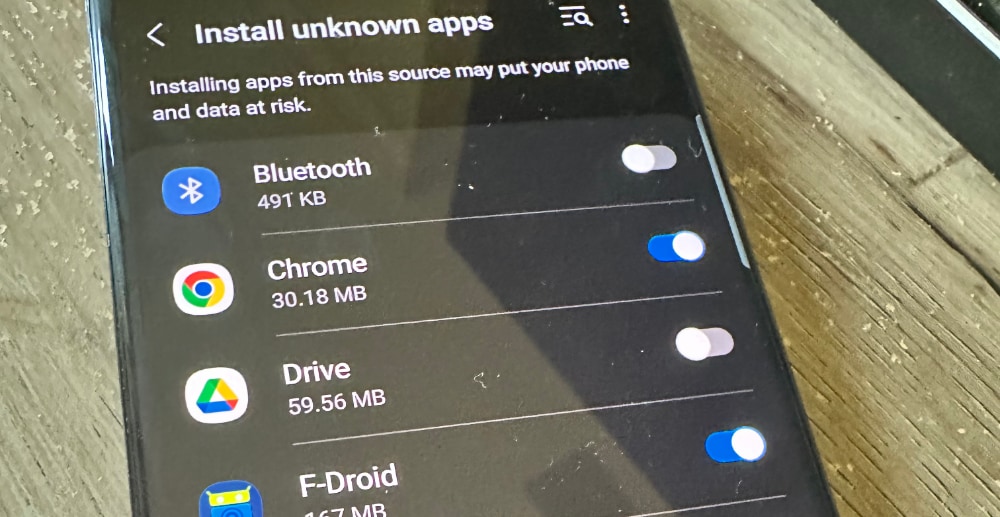
Start with F-Droid. You can download the APK from their website. To install it, you will need to enable installations by other applications from outside of the Google Play store by enabling it in settings.
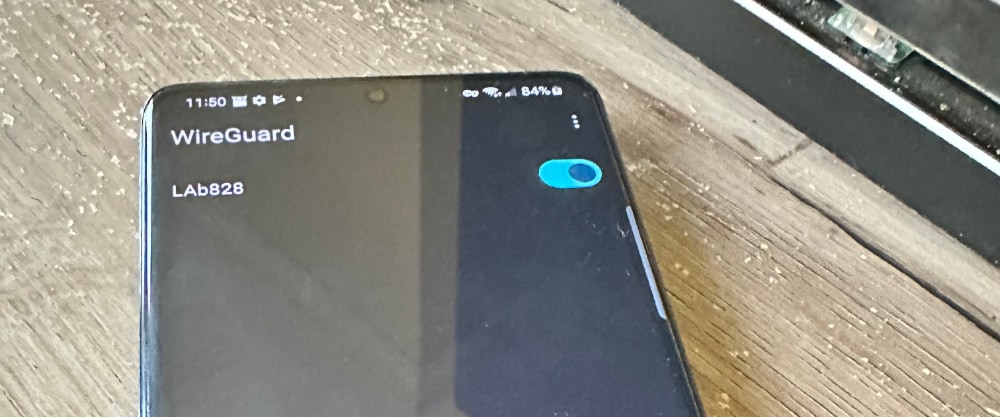
You will also need an IPv6rs account for an external IPv6 address and WireGuard.
Make sure you set this up and connect before we go to the next steps. Just go to the IPv6rs panel, create a new IP, and scan the QR code with the WireGuard app on Android.
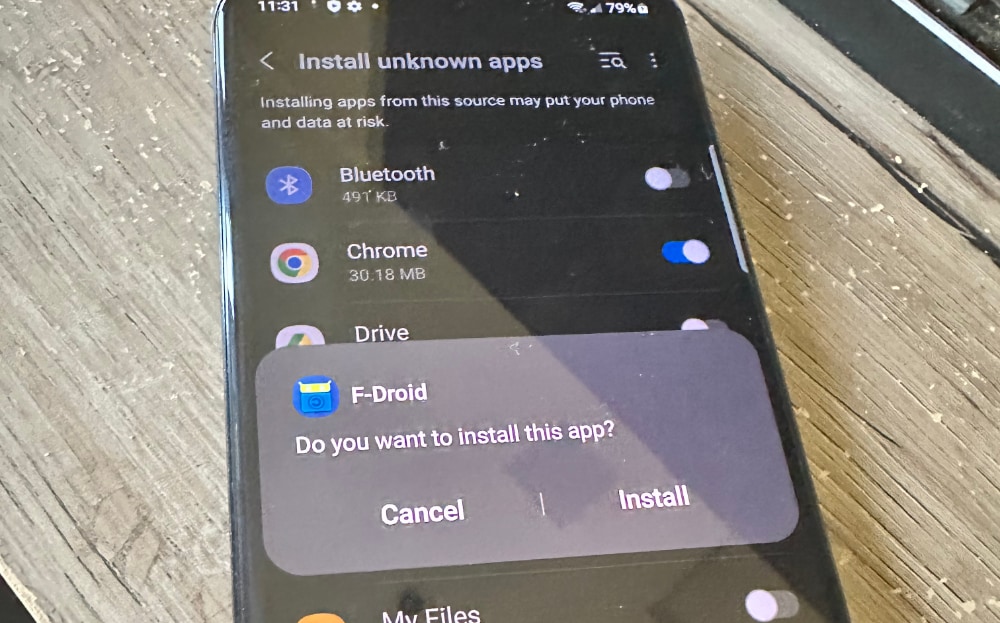
You will need to enable F-droid to install applications in the same part of the Android settings as when you enabled Chrome to install F-droid earlier.
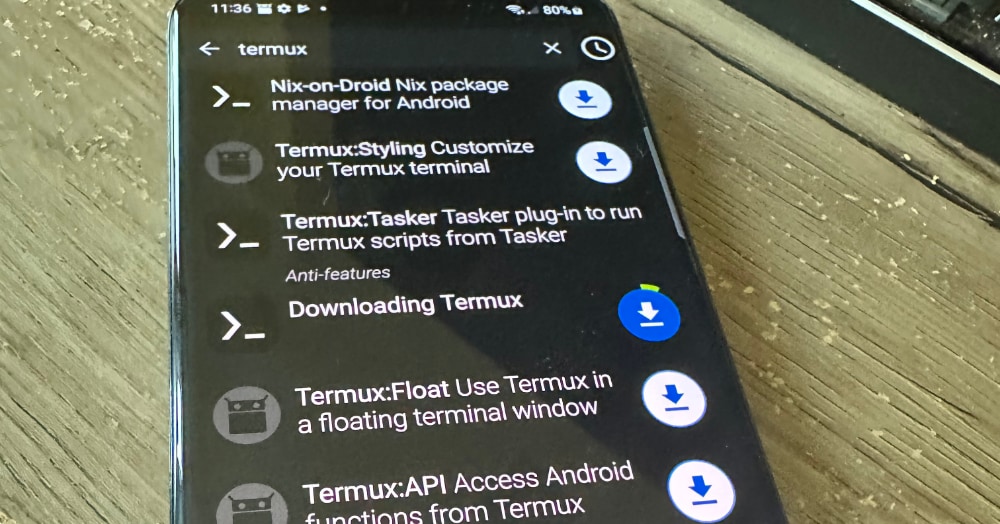
Once that’s done, go into F-Droid and give it a few minutes to update its repositories. Once complete, you will see the F-droid store. Browse around and enjoy, but once ready, go to categories and at the top, remove everything from the input box and search for Termux.
Once Termux is downloaded, you will have a Linux server. Termux drops you at a bash prompt.
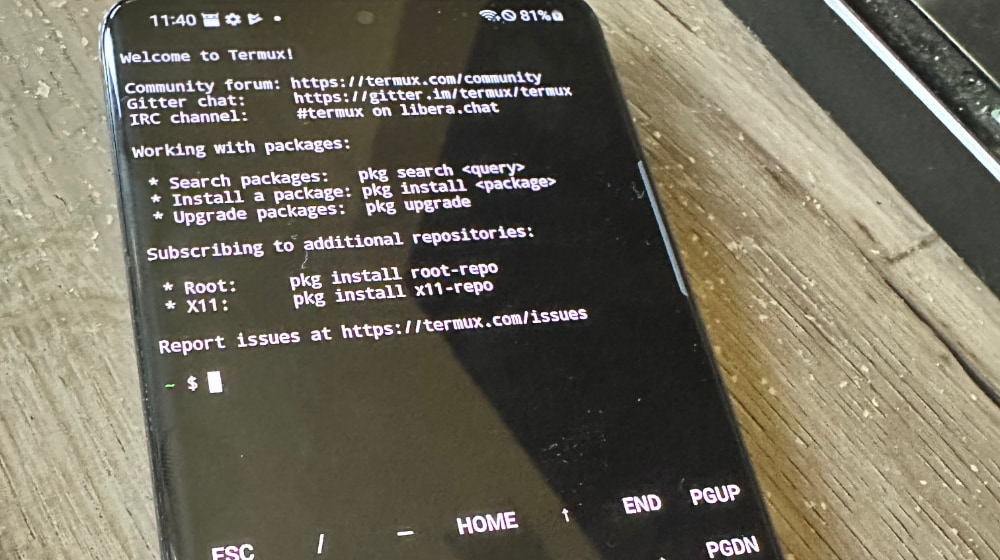
Once in termux, start by typing:
pkg update
pkg upgrade
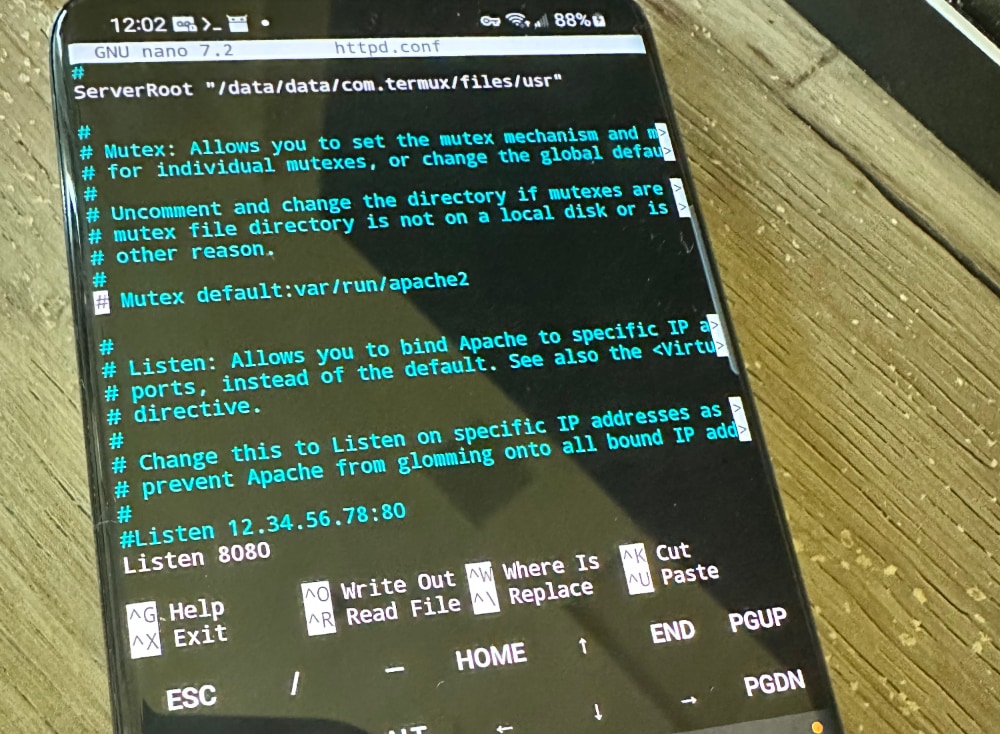
pkg install apache2
pkg install opensshIf your repos aren’t responding, you can change your repos with termux-change-repo.
DNS
Now, go ahead and set your DNS AAAA to your IPv6rs IPv6 address. If you want to be accessible via IPv4, you should also set your A record to the gateway IPv4 address where your IPv6 IP is routing.

In my case, android.thin.computer points to the IPv6 IP I connected on the Wireguard earlier and the A record points to the LA gateway which is where it’s located.
Port Forwarding
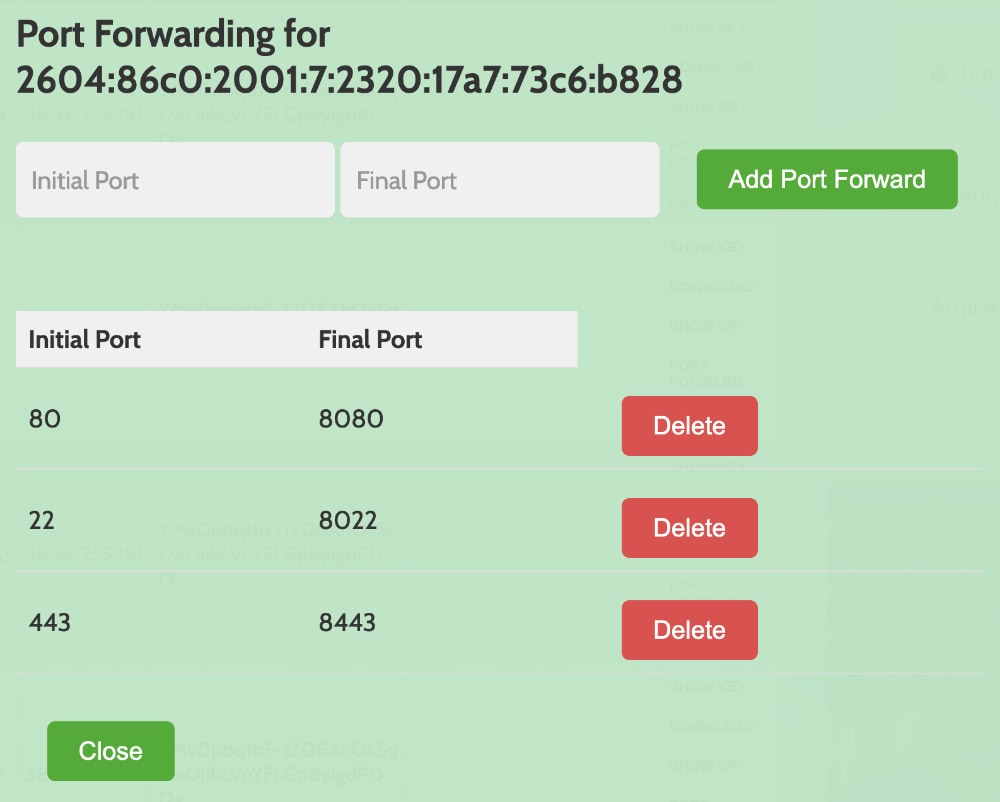
Next, you’ll need to setup port forwarding. In the IPv6rs panel, you can click on port forward and point port 80 to 8080 and port 443 to 8443.
Setup LETSENCRYPT WITH TERMUX ON ANDROID
Now, I needed an SSL certificate. Here’s how I ran Let’s Encrypt in Termux, on Android, to get the SSL.
pkg install python rust binutils
uname -m
rustc --print target-list | grep android
After the rustc command, you will get a list of architectures. When you find the one that includes the output in the uname command, use in in the following command:
export CARGO_BUILD_TARGET=TARGET_HEREFor example, in my case it was:
export CARGO_BUILD_TARGET=aarch64-linux-androidNow, go ahead and setup the Let’s Encrypt software:
python -m venv $PREFIX/opt/certbot
$PREFIX/opt/certbot/bin/pip install --upgrade pip
$PREFIX/opt/certbot/bin/pip install certbot
ln -s $PREFIX/opt/certbot/bin/certbot $PREFIX/bin/certbot
Now, run certbot to get your certificates:
certbot certonly --work-dir $PREFIX/var/lib/letsencrypt --logs-dir $PREFIX/var/log/letsencrypt --config-dir $PREFIX/etc/letsencrypt -d DNS,DNS1,DNS2,...For me, I ran this command here:
certbot certonly --work-dir $PREFIX/var/lib/letsencrypt --logs-dir $PREFIX/var/log/letsencrypt --config-dir $PREFIX/etc/letsencrypt -d android.thin.computerWhen certbot runs, it will give you a choice of 1) trying to setup a web server, and 2) share your current web server’s htdocs location. Since we installed apache earlier and the port forward from 80->8080, we can choose 2 (1 will fail due to lack of root):
/data/data/com.termux/files/usr/share/apache2/default-site/htdocsNow that you have your SSL certificates, you can continue to use Apache Web server, which is great, or you can uninstall it and run your own (nginx, custom, etc.). In my case, I stopped apache with apachectl -k stop.
Also, make sure to enable your ssh server:
sshdWake ON LOCK
Now that your machine is setup, you can ssh into it from the outside, have SSL certificates, etc., you’ll need to make sure your machine doesn’t become inaccessible due to the phone’s settings.
For me, on the Samsung Galaxy S21, I went to the battery and power settings and was able to select normal CPU mode instead of throttled. However, to keep the app from closing when the phone is idle, you’ll need wake on lock.
At the prompt in your termux, type the following to keep your phone server from lagging out:
termux-wake-lockIf for some reason you wish to turn this off in the future, simply s/lock/unlock (switch lock with unlock).
In my case, I also installed termux-api and downloaded the apk from F-droid for the Termux API as well. Finally, I installed nodejs and setup android.thin.computer.
I hope you enjoyed this post as much as I enjoyed setting up a server on Android. 😉
Edit: After getting hugged to death by /r/selfhosted on reddit, I had to figure out how to stop Termux from crashing due to a boatload of traffic (50K+ views in 4 hours). Here’s how:
- Connect USB
- Activate Developer options by going to Settings -> About -> Find the Build # and tap it 7 times
- Go into Developer options and activate ADB over USB
- Type the following:
adb shell "/system/bin/device_config set_sync_disabled_for_tests persistent"
adb shell "/system/bin/device_config put activity_manager max_phantom_processes 2147483647"
adb shell settings put global settings_enable_monitor_phantom_procs false
Now sleep well knowing that your Web Server on your Android Phone can handle being a top post on reddit!
Leave a Reply